

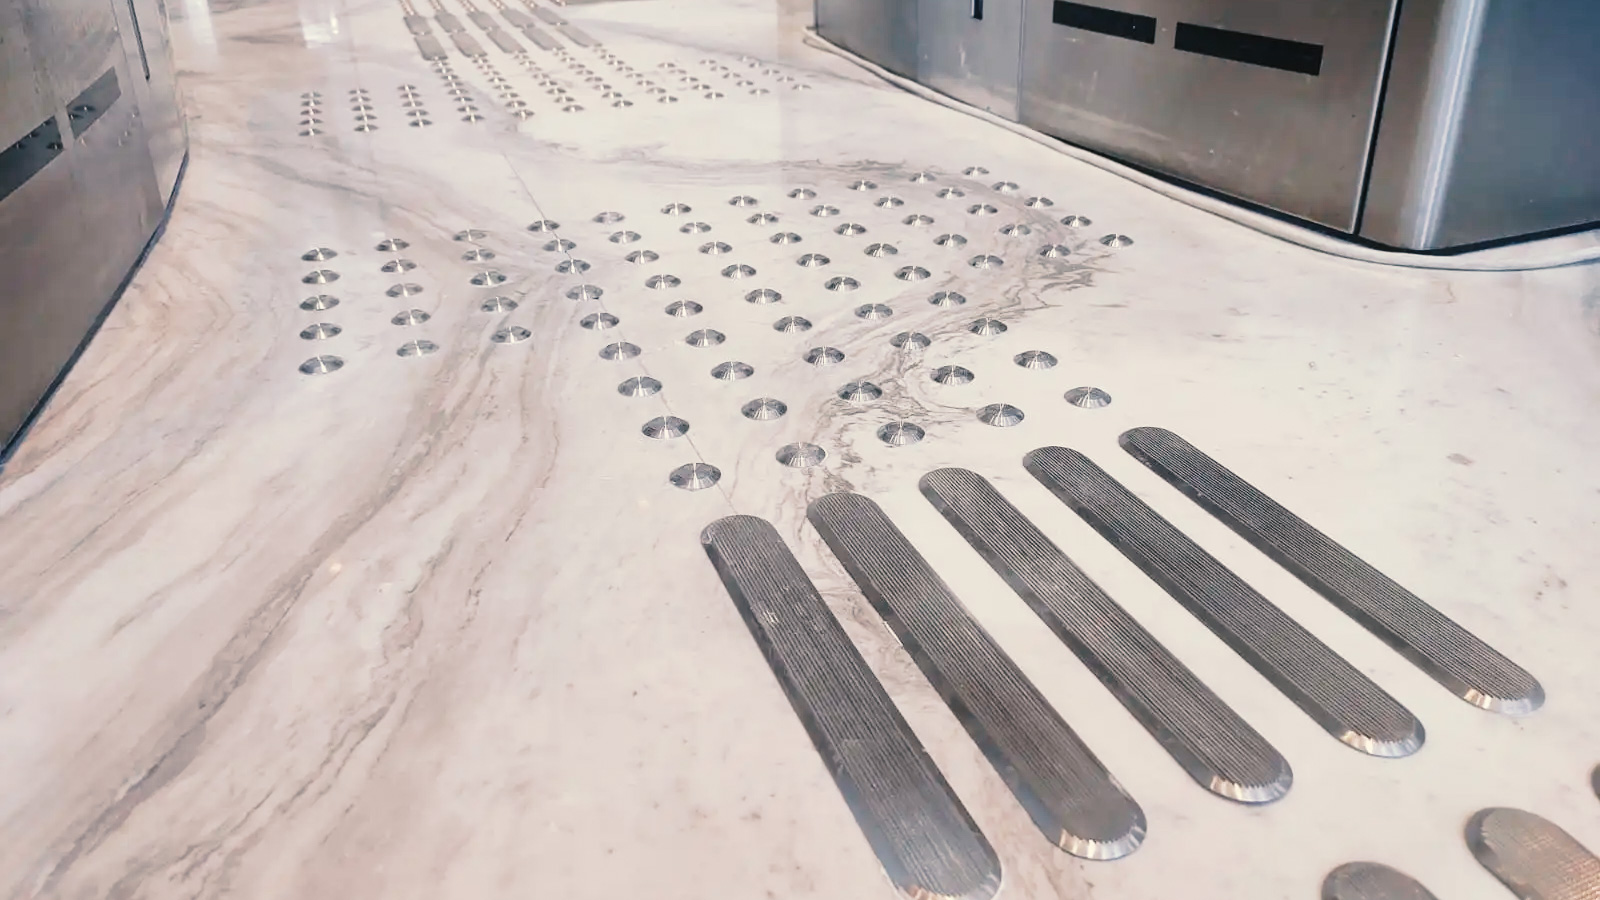
Master Guide: How to Install Tactile Studs and Guidance Directional Lines (Mono-Pin & Self-Adhesive)
Tactile Ground Surface Indicators (TGSIs) are critical accessibility features that assist visually impaired pedestrians in navigating public spaces safely. Whether you are installing warning indicators (tactile studs/hazard dots) to signal impending hazards or directional indicators (tactile lines/stripes) to guide foot traffic, applying them correctly is vital for long-term durability and regulatory compliance.
This comprehensive guide covers step-by-step installation methodologies for both Mono-Pin (Stemmed) and Self-Adhesive (Peel & Stick) tactile indicators across various substrates, including natural stone, concrete, ceramic tiles, and vinyl floors.
Technical Overview: Mono-Pin vs. Self-Adhesive
Before starting installation, selecting the right fixing method based on floor traffic, substrate material, and project duration is essential.
| Feature | Mono-Pin (Stemmed) Tactiles | Self-Adhesive (Peel & Stick) Tactiles |
| Primary Substrates | Granite, Marble, Concrete, Terrazzo, Ceramic | Epoxy floors, Smooth Vinyl (LVT/VCT), Polished Concrete, Timber |
| Traffic Rating | Heavy / High-footfall (Airports, Metro Stations, Malls) | Light-to-Medium / Retrofit / Temporary or Rapid Access |
| Fixing Mechanism | Chemical Anchor / Epoxy Resin via drilled boreholes | High-tack Pressure Sensitive Adhesive (PSA) tape backing |
| Installation Speed | Moderate (Requires drilling and curing time) | Fast (Zero drilling, instant adhesion) |
| Substrate Impact | Permanent drill holes | Non-destructive (Can be removed without structural substrate damage) |
1. Preparing for Installation
Regardless of the tactile type, proper surface preparation accounts for 80% of bond success.
Required Tools & Equipment
- Layout & Measurement: Chalk line, laser level, tape measure, masking tape.
- Drilling (Mono-Pin Only): SDS Rotary hammer drill, 6mm / 8mm / 10mm diamond core bits or carbide drill bits (matching pin diameter), depth stop.
- Cleaning & Surface Prep: Industrial vacuum, compressed air blow pump, isopropyl alcohol (IPA) cleaner, lint-free microfiber cloths.
- Chemicals & Adhesives (Mono-Pin Only): Two-part structural epoxy resin or chemical anchoring gel, dispensing gun, mixing nozzles.
- Pressure Application (Self-Adhesive Only): Heavy-duty rubber pressure roller, heat gun (optional, for cold environments).
- Templates: Standardized aluminum or plastic drilling/placement templates (conforming to local ADA/BS 8300 spacing standards).
2. Installing Mono-Pin (Stemmed) Tactile Studs & Lines
Mono-pin indicators utilize a solid metal/polyurethane stem on the underside that drops into a drilled borehole filled with epoxy resin, locking the tactile mechanically and chemically into the substrate.
Step 1: Substrate Inspection & Drilling Layout
- Clean the Surface: Ensure the subfloor is structurally sound, fully cured, and free of moisture, oil, or dust.
- Set the Grid: Using a laser line or chalk line, frame the outer boundary where the tactiles will reside.
- Position the Template: Secure your drilling template to the substrate using masking tape to prevent slipping during drilling.
Step 2: Precision Drilling
- Set Drill Depth: Adjust your drill depth gauge to match the pin length plus 2mm–3mm of extra depth for epoxy relief.
- Drill the Holes: Holding the drill perfectly perpendicular (90 Degrees) to the floor, drill into the subfloor through the template alignment holes.
- Tip: For hard stone or porcelain, use a wet diamond core bit without hammer action to prevent substrate cracking.
- Clean the Boreholes: Vacuum out dust, use compressed air to blast remaining debris from inside the hole, and vacuum again. Clean holes are mandatory for epoxy bonding.
Step 3: Epoxy Application & Pin Insertion
- Dispense Resin: Inject a small, controlled amount of 2-part structural epoxy resin into the bottom of the drilled hole (fill roughly 1/3 to 1/2 of the hole depth).
- Insert the Tactile: Press the mono-pin tactile down firmly into the hole with a slight twisting motion to evenly distribute the resin around the pin.
- Flush Alignment: Ensure the tactile base sits flat against the floor surface with no floating edges.
- Clean Excess: Immediately wipe away any epoxy squeeze-out using a cloth dampened with solvent/cleaning alcohol before it cures.
Step 4: Curing
- Allow the epoxy to cure according to manufacturer specifications (typically 2 to 4 hours for foot traffic; 24 hours for full chemical load curing). Place warning cones around the area.
3. Installing Self-Adhesive Tactile Studs & Lines
Self-adhesive tactiles feature a heavy-duty butyl or acrylic pressure-sensitive adhesive backing. They offer rapid installation with zero noise or dust pollution, making them ideal for indoor retrofits, hospitals, and operational commercial hubs.
Step 1: Surface Preparation & Degreasing
- Dry Clean: Thoroughly sweep and vacuum the application zone.
- Chemical Degreasing: Wipe the surface thoroughly using Isopropyl Alcohol (IPA) or a specialized substrate cleaner. Allow the solvent to flash off completely.
- Note: Do not use petroleum-based cleaners, as they leave a greasy film that compromises adhesive tack.
- Temperature Check: Ensure ambient and floor temperatures are within the ideal bonding range (typically between 15 Degrees and 30 Degrees).
Step 2: Layout & Alignment
- Position the Grid Template: Place the tactile alignment template over the clean, dry substrate and mark outer grid boundaries.
- Dry Run: Lay out the tactiles inside the template grid to verify geometry and visual contrast before exposing the adhesive backing.
Step 3: Application & Pressure Rolling
- Peel the Liner: Carefully peel off the protective backing paper from the tactile, taking care not to touch the exposed adhesive with bare hands or introduce dust.
- Place Firmly: Lower the tactile stud or line straight down onto the floor using the template to guide placement. Avoid dragging or repositioning once contact is made.
- Apply Mechanical Pressure: Pass a heavy rubber roller over every stud and line using firm, direct body weight.
- Crucial Step: Pressure-sensitive adhesives require strong initial mechanical pressure to form a complete bond line with the micro-texture of the subfloor.
Step 4: Final Inspection & Commissioning
- Check edge adhesion on peripheral studs to confirm zero lift.
- Self-adhesive indicators are typically ready for immediate pedestrian foot traffic post-rolling.
Best Practices & Quality Control Checklist
- Contrast & Regulations: Verify that tactile colors provide adequate Luminance Contrast (LRV ratio) against the surrounding substrate as mandated by local accessibility codes.
- Expansion Joints: Never place tactile studs or lines directly across structural expansion or movement joints. Break the tactile pattern cleanly at the joint line.
- Cleaning Maintenance: Advice facility teams to avoid high-pressure wash bars or harsh acid-based floor strippers directly over self-adhesive elements.
At Tactiles.ae by Al Shabib Trading LLC, we do more than just supply industry-grade accessibility solutions—we are your dedicated partners in creating safe, compliant, and universally accessible spaces.
Whether you need expert advice on choosing between mono-pin and self-adhesive indicators, precise layout guidance according to local accessibility codes, or full-scale supply and installation support, our team is always here to assist and guide you through every stage of your project.
Ready to get started or need a custom consultation?
Website: tactiles.ae
Email: info@tactiles.ae
Phone / WhatsApp: +971 50 780 6484